Firebase Authentication
Setting up authentication flow using Firebase for a Flutter mobile application involves several steps. Here's a basic guide:
1. Create a Firebase Project:
- Go to the Firebase Console (https://console.firebase.google.com/).
- Follow the instructions to set up Firebase for your Flutter app.
2. Add Firebase to Flutter project:
- In your Flutter project, add Firebase to your app by following the instructions provided by Firebase for your specific platform (Android/iOS).
- This typically involves adding configuration files provided by Firebase to your project.
3. Enable Authentication:
- In the Firebase Console, go to the Authentication section.
- Enable the authentication methods you want to use (Email/Password, Google Sign-In, Facebook Login, etc.).
4. Add Required Dependencies:
-
Add the Firebase Authentication dependency to your
pubspec.yamlfile:

- Run flutter pub get to install the new dependencies.
5. Initialize Firebase:
-
Initialize Firebase in your Flutter app by calling
Firebase.initializeApp()in your app's entry point (usually main.dart).
6. Implement Authentication Flow:
- Depending on the authentication method(s) you enabled, implement the necessary logic to sign up, sign in, and sign out users in your Flutter app.
- For example, for email/password authentication:

7. UI Integration:
- Integrate the authentication methods with your UI. This might involve creating sign-up, sign-in, and sign-out screens/widgets and calling the appropriate methods based on user interactions.
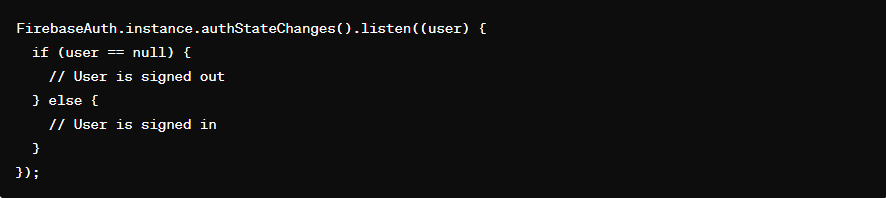
8. Handle Authentication State Changes:
- Listen for authentication state changes and update your UI accordingly. Firebase provides a stream you can listen to for this purpose:
9. Testing
- Test your authentication flow thoroughly to ensure that users can sign up, sign in, and sign out successfully.
10. Security Rules:
- Configure security rules for your Firebase project to control access to Firebase resources.